Helm Chart RepositoryをGitLabのrawでやる

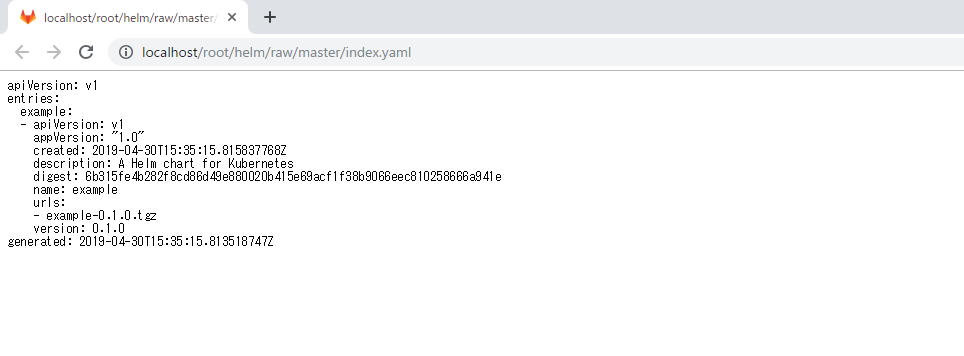
Helm Chart RepositoryはHTTPでindex.yamlとchartを返せればいいらしいので、上の画像のようにGitLabのrawでHelm Chat Repositoryをホスティングしてみようと思います。
参考:https://helm.sh/docs/developing_charts/#chart-repositories
GitLabを立てる
とりあえずDockerで適当なGitLab立ててみます。
$ docker run -d -p 80:80 --name gitlab gitlab/gitlab-ce:11.10.1-ce.0
かなり時間かかるので気長に待ちます。
しばらく待った後、以下URLにアクセスします。
http://localhost
パスワード変更を求められるので変更して、その後ログインします。
ついでにRepositoryも作っておきます。
helmというRepositoryを作っておきました。

あとはアクセストークンを発行しておきます。
参考:Personal access tokens | GitLab
Helmのインストール
Helmのインストールとセットアップをします。
$ curl -sSLO https://storage.googleapis.com/kubernetes-helm/helm-v2.13.1-linux-amd64.tar.gz
$ tar -zxvf helm-v2.13.1-linux-amd64.tar.gz
$ mv linux-amd64/helm /usr/local/bin/helm
$ helm init --client-only
Tillerは必要ないので--client-onlyオプションをつけています。
Helm Chartを作る
Chartを作ってGitLabにPushしたいと思います。
$ git clone http://localhost/root/helm.git
$ cd helm
$ helm create example
$ helm package example
$ helm repo index .
$ git add .
$ git commit -m "first commit"
$ git push -u origin master
helm createコマンドでnginxのChartが作られるのでこれをそのまま使います。
作ったChartを使ってみる
作ったChart Repositoryを追加して、Manifest fileを表示してみます。
$ cd
$ helm repo add example http://localhost/root/helm/raw/master?private_token=sjPe5CP8iev1SYy2T4op # アクセストークンをつける
$ helm list
NAME            URL
stable          https://kubernetes-charts.storage.googleapis.com
local           http://127.0.0.1:8879/charts
example         http://localhost/root/helm/raw/master?private_token=sjPe5CP8iev1SYy2T4op
$ helm fetch example/example
$ helm template example-0.1.0.tgz
---
# Source: example/templates/service.yaml
apiVersion: v1
kind: Service
metadata:
  name: release-name-example
・・・
helm repo addコマンドでRepositoryを追加するのですが、先ほど作ったGitLabのアクセストークンをつけてコマンドを実行することでprivateなRepositoryでも追加することができます。
helm templateコマンドでManifest fileが表示できたと思います。